Firstly, yes, I have pictures, but they aren't uploaded yet and I'm just going to seize the moment to write this while I can and edit the photos in later. Sorry.
Secondly, the background - while shopping for Gabriel's Easter basket goodies, I had a brilliant idea. (This should probably have been my first warning). See, I didn't really want to get a basket - the handle sticks up and makes it an odd shape to fit onto a shelf or anything, which makes it difficult to reuse for storage purposes after the candy is all eaten, and I really didn't want to waste money on something that was just going to get trashed. So instead, I got a small Sterilite tote and 20 pounds of rice. Figured I'd hide the plastic eggs full of candy in the rice for a nice contained easy "egg hunt" and then afterwards the tub of rice is itself a great sensory toy. Yeah.... here's my thoughts 4 days later.
1. I can see why this is a great sensory toy for little kids - I actually kinda enjoyed digging my hands through the rice.
2. I had no idea rice was so dusty.
3. Rice is the perfect size and shape to wedge itself under your fingernails (much less of a problem for my toddler).
4. I should have listened to my husband when he suggested taping the eggs shut.
5. I should have remembered to put "basket" and child in empty tub for easy clean up.
6. A Sterilite tub, even with a lid on it, is not nearly enough to contain 20 lbs of rice. Rice travels. Especially when you didn't tape the easter eggs shut.
7. Hiding candy in the rice was a bad idea. My toddler's only interest in the bucket of rice is for the candy. Which is now full of rice because I didn't tape the easter eggs shut.
8. I want to know what happened to the rest of the Reese's peanut butter bunnies. We started with 5, I ate 2, and I certainly didn't give any of those prizes to the toddler. So either my husband and the kidlet ate the other 3 when I wasn't looking (entirely likely) or else they are so well buried in the rice that even I can't find them. Either way, I'm pouting.
Wednesday, April 27, 2011

Sunday, April 10, 2011
There May Be Hope Yet
Hope of Spring, that is. In fact, I'm going to say we may eve have turned the corner and be well and truly done with winter. (I do hope I'm not jinxing anything by saying that.) But the weather has been quite nice, in the mid 50's for most of the week, and even up to 80 today! Plus, despite the promised thunderstorms, there hasn't been a drop of rain all day. It's actually been quite nice - a little on the muggy side but with a nice breeze to keep the air moving and make it a very nice day to be outside. Which is exactly where we've been! Tuesday or Wednesday (can't remember which day,) we went to the botanical gardens and actually saw *gasp* flowers! I only had my cell phone with me, no camera (bad mama!) so nothing outstanding for photos, but I just had to try anyway. I've been quite green with envy over all the lovely flower photos I see on everyone else's blogs these days and quite antsy waiting for some color to start popping up in my little corner of the world. Hopefully putting them all together in a collage kind of makes up for the cell phone camera? Maybe? Well I'm going to say it does. And I made the background green, because let's face it, the grass sure isn't yet. :(

In other adventures, this week, we went to the zoo on Thursday with some friends and to the park today with Daddy. And we got new shoes. Because someone was in a sharing kind of mood at the zoo.

Yup. He dropped it right into the prairie dog exhibit. Ok, to be fair, he didn't do it on purpose. I think it actually just fell off his foot. The exhibit is set up so that you stand on a ramp above the prairie dogs and look down into the exhibit. The "fence" is just a rope net. Certainly enough to keep a person out, but not, apparantly, toddler sized sneakers. Doh. Yes, we did go find someone to let them know about it so they could get it out, but I decided I'd had enough of theom falling off his feet everywhere we go and this made an excellent excuse to buy new shoes.
And just because he's so stinkin adorable, I'll leave you with a random shot of the red panda. :)

Tuesday, March 29, 2011
Fixing Crochet
This was another thing I had actually done earlier in the month, but I really wanted to share it with you. Have you ever had something handcrafted that you really loved, and then it got a hole in it? My sister gave me this afghan to fix for her last fall, but it took me a long time to figure out how to fix it. It was a wedding present from her husband's aunt, who has since passed away, so it's really special to her and she was really hoping I could find a way to fix it. Holes in crochet are not easy to fix, though, as each stitch is built on the previous stitches. And this was quite the hole.

And quite the pattern! Just figuring out the stitch pattern took me quite a while. I finally looked up the Catherine Wheel stitch pattern in a stitch dictionary, copied out the instructions for it, and used it to make a dishcloth to practice the stitch. Then I went back to the afghan and studied the specific variation of the Catherine Wheel - how many stitches in the wheel, how many chains, etc. The other thing I did right away was to pull the long yarn tail through all of the loose stitches and knot it to the short tail. It meant when I went to do the actual work, I had less yarn to work with, but it also meant that I didn't have to worry about additional stitches pulling out.

When it came to actually putting the missing stitches back in, it was a slow process. Basically what I did is to do 1 stitch take the loop off the hook and insert the hook through the loops of the stitch in the row above, then pull the loop of the stitch I just completed through the stitch above it. I bet that's about clear as mud. In the picture above, you can see the hook inserted through the stitch in the next row, and the loop of the stitch I just completed hanging down below the hook.
I had to be very careful with my counting to be sure that I was putting the right number of stitches in the right places - fortunately, it was pretty easy to tell where the stitches should work into, since those places were stretched out. : )

I did run out of yarn and had to finish off with some yarn I had on hand, so there is that small patch where the color is a little off. I didn't really want to run around trying to find an exact color match and then end up with an entire skein of yarn left over for just that tiny amount. You can certainly see where the "patch" is and you can tell the difference between my stitches and the original work if you are looking for it - but all in all, I'd say that's a pretty good fix, and an accomplishment to have figured out the solution all on my own! And the method could be applied to I think just about any crochet piece. All it takes is a little patience.

And quite the pattern! Just figuring out the stitch pattern took me quite a while. I finally looked up the Catherine Wheel stitch pattern in a stitch dictionary, copied out the instructions for it, and used it to make a dishcloth to practice the stitch. Then I went back to the afghan and studied the specific variation of the Catherine Wheel - how many stitches in the wheel, how many chains, etc. The other thing I did right away was to pull the long yarn tail through all of the loose stitches and knot it to the short tail. It meant when I went to do the actual work, I had less yarn to work with, but it also meant that I didn't have to worry about additional stitches pulling out.

When it came to actually putting the missing stitches back in, it was a slow process. Basically what I did is to do 1 stitch take the loop off the hook and insert the hook through the loops of the stitch in the row above, then pull the loop of the stitch I just completed through the stitch above it. I bet that's about clear as mud. In the picture above, you can see the hook inserted through the stitch in the next row, and the loop of the stitch I just completed hanging down below the hook.
 |
| Grab the loop of the just completed stitch and pull it through |
 |
| Turn the hook around and work next stitch |
I had to be very careful with my counting to be sure that I was putting the right number of stitches in the right places - fortunately, it was pretty easy to tell where the stitches should work into, since those places were stretched out. : )

I did run out of yarn and had to finish off with some yarn I had on hand, so there is that small patch where the color is a little off. I didn't really want to run around trying to find an exact color match and then end up with an entire skein of yarn left over for just that tiny amount. You can certainly see where the "patch" is and you can tell the difference between my stitches and the original work if you are looking for it - but all in all, I'd say that's a pretty good fix, and an accomplishment to have figured out the solution all on my own! And the method could be applied to I think just about any crochet piece. All it takes is a little patience.
Monday, March 28, 2011
Time Machine, Pt 2 (Magic Yarn Swap)
 |
| All the goodies! |
 |
| Made this bag and there's a deck of cards inside |
 |
| Made this bag, too, and the gingerbread spice candles were something I'd made previously and had on hand |
 |
| Double ended stitch markers for knitting or crocheting |
 |
| Everything wrapped up and boxed up |
I had such a hard time choosing the yarn and pattern for this package. We each filled out a questionnaire about our interests and favorite colors, yarns, etc. but we were supposed to keep it a secret whose name we had, so that it was a surprise when we received our yarn. I never thought it would be so hard to pick out a pattern and yarn for another person! She really liked it, though, and said she'd actually been needing a new handbag, so it worked out great. This was also the swap I did the needle roll for, and she hadn't had anything to keep her needles in before that, so she loved that too. Phew!
And of course, I have to share what I received. : ) I'm only going to share 1 shot of everything once I had it all unwrapped, because I don't have any really good shots. I couldn't find the camera when I was unwrapping the yarn, and didn't have the patience to look for it, so I just used my cell phone. The pattern is a lariat necklace / scarf using crochet thread, but I'll share more about that when I finish making it.
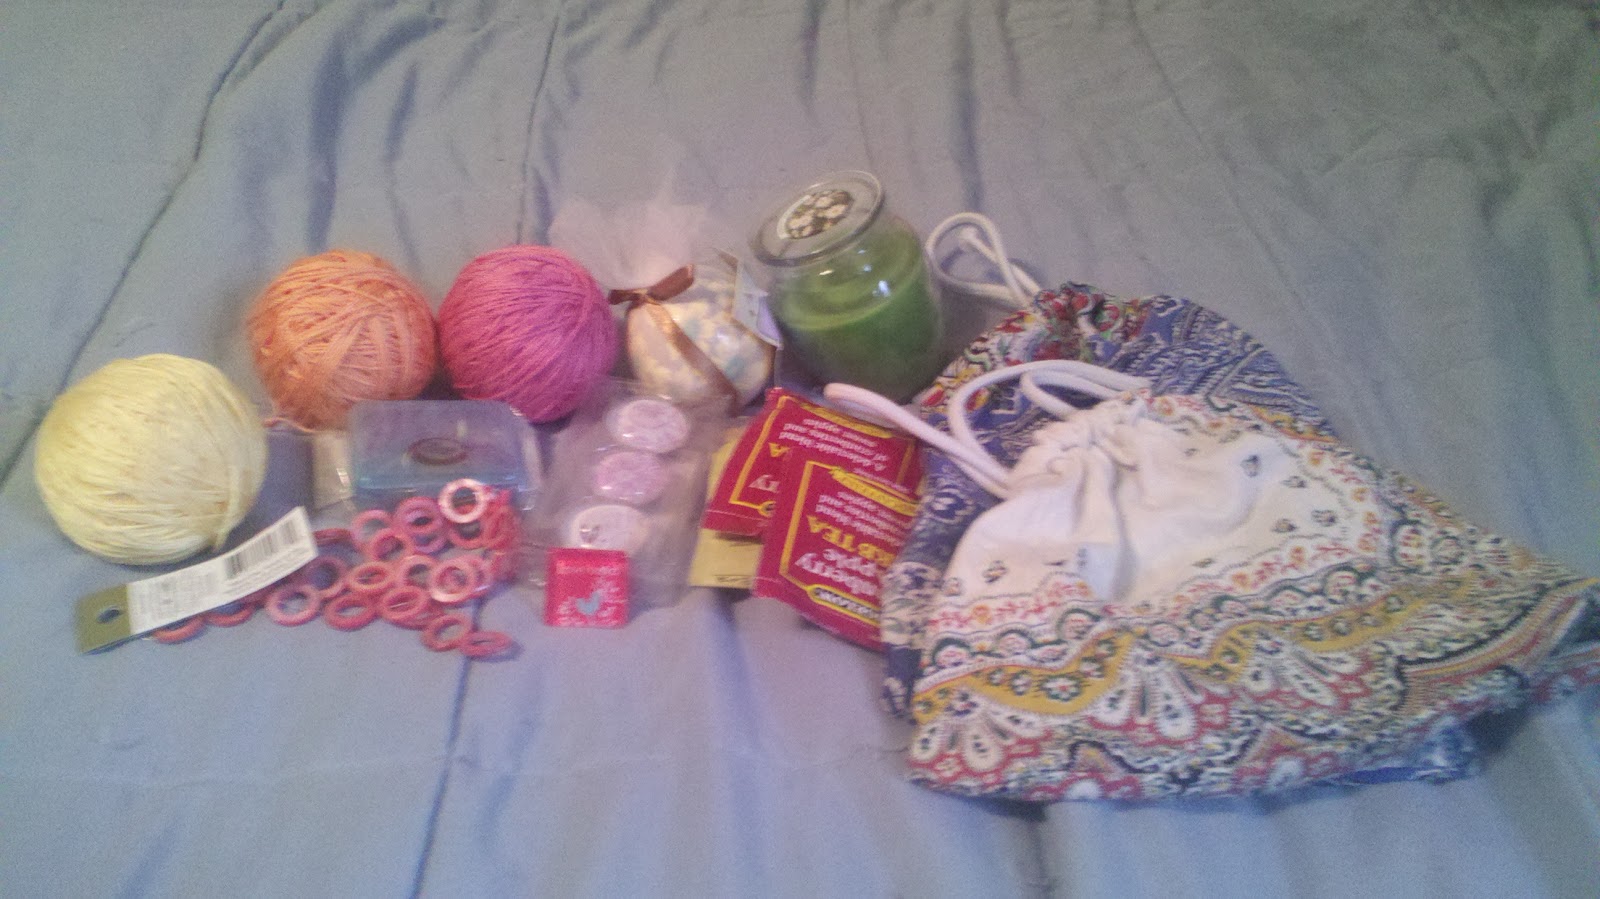
There's 3 different colors of crochet thread which will be wonderful for making jewelry; a bath fizzy; a spring meadow scented candle (which I keep going back to, it's just loverly, ahhhh); some beads; a pink charm that says "love hard"; a package of stitch markers; a package of really pretty pink swirly magnets; an assortment of tea; and a couple drawstring bags. Those bags especially are going to be super useful, I'm always looking for little bags like that to keep things organized in my project bag. And I'm so excited to use the thread, beads, and charm to make some really pretty jewelry!
Sunday, March 27, 2011
Time Machine, Pt 1
You may have noticed I haven't posted in a while... like all month... *blush* I have been taking photos, though, so we're just going to pretend I'm posting these on time, all right? You good with that? Oh good, I knew you would be. : ) I'm also going to try to write up a few posts now while I have time, and schedule them to post later in the week. A little experiment! We'll see if that works out. ; )
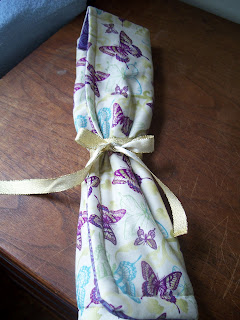

So for this post, I just wanted to share a couple quick projects that I'm rather proud of. This was a knitting needle roll that I sewed to send to someone in a magic yarn swap (more about that later this week!) I'm really proud of it because I do not sew. This was pretty easy, though, it came together in just a few hours and was relatively painless. There's 3 layers of pockets with different sized slots for needles and notions. It was easy enough, I even made a few changes to the tutorial and made a crochet hook case for another gift! The link for the tutorial I used is here.


The other project I wanted to share is this mix and match bracelet. It's actually 3 bracelets, with lobster clasps at each end. The lobster clasps clip onto the rings of the magnetic clasp, so you can take them on and off easily to choose which bracelets you want to wear together - 1, 2, or all 3! I really love magnetic clasps for bracelets, since they're easy to put it on yourself. This was for another swap, but I really like it, so I think I'll be making another one for myself.
Tuesday, March 1, 2011
Fishy Fishy

Would you believe that picture is the inside of a table? It is! Here, I'll zoom out a little and show you the edges -


The edge of the picture is covered in gold foil, and then there's shells all around that. You can see the lights from the window reflected in the table top, too. Obviously, this isn't an actual aquarium. It's more a light box - you have to push a button and it lights up from the bottom, everything is translucent so the light shines through it, and some of the fish move, scrolling across from left to right. I was actually surprised how well these photos turned out, especially considering I didn't have my camera with me so these are from my phone.
Oh, I suppose you'd like to know what type of place has tables like this? It's Ella's Deli, of course. My sis came for a visit last wee and took Mom, me, and the little one there for a snack of fried pickles and ice cream sundaes (two separate dishes!). And no, she is not pregnant. She just was wanting fried pickles, and you can't go to Ella's without getting ice cream. *giggle* You can see more photos from Ella's in this post. I can't wait for it to warm up enough for them to open up the carousel!
Monday, February 28, 2011
A Quick Peek

It still needs lining, actually, both of these still need lining, so quite a full ta-dah post yet, but the crochet is finished, all the ends sewn in, and all the pieces sewn on. I finished off the top of the 3Rs bag by turning the 3rd round of the pink into a straight edge following some advice from one of the lovely ladies on the We Love Lucy Ravelry group. And oh I can't believe I didn't somehow make note of the blog post where she explained how she turned the edge of her ripple into straight - of course hers was the ripple blanket, but we were both using Lucy's neat ripple pattern, and it worked perfectly on my bag. Anyway, then I topped that off with the yellow shell edging, added a couple flowers and the straps, and that's it! That smaller bag in the corner, with the straight stripes, that is a makeup case, which you can find the pattern for it here. That'll be my hook/notions case, as the 3Rs bag is going to be a project bag.
And now it's bedtime for a certain little boy, well past it actually - I'll have to come back and edit in the links for the patterns later after he's asleep. TTFN - ta ta for now!
PS - I'm so much happier with this photo than with the yucky no light ones from last week. And I actually made an attempt at composition! Go me!
PPS - Took me til this morning, but the links are in now. Enjoy!
Subscribe to:
Posts (Atom)